Are your smart devices spying on you? Make better purchasing choices and find products that respect your privacy at Unwanted.cloud
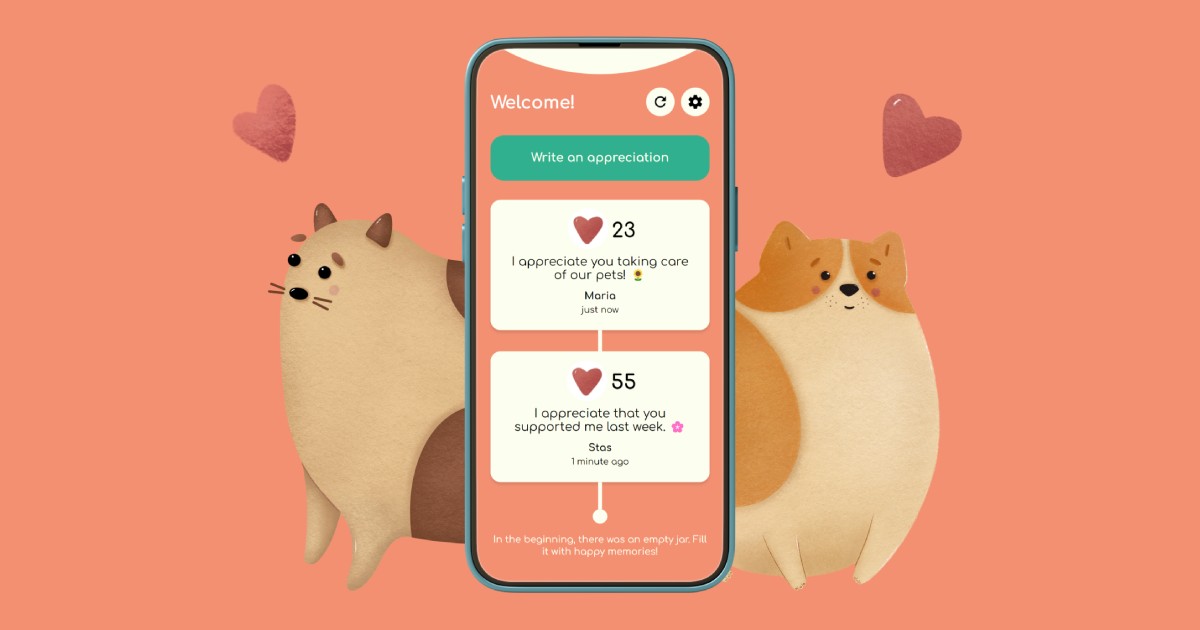
Appreciation Jar
I recently launched the Appreciation Jar app. It is a gratitude journaling app for couples. Try it here!
Popular post
 Preconfigured Airplay speaker (Shairport) – Downloadable Raspberry Pi image
Download a preconfigured image for the Raspberry Pi that allows you to use the Pi as an Airplay speaker!